If you trust yourself enough to use the <style> tag within your self-hosted WordPress blog then here is how to get them to work:
- Go to your WordPress installation and locate the wp-includes\kses.php file
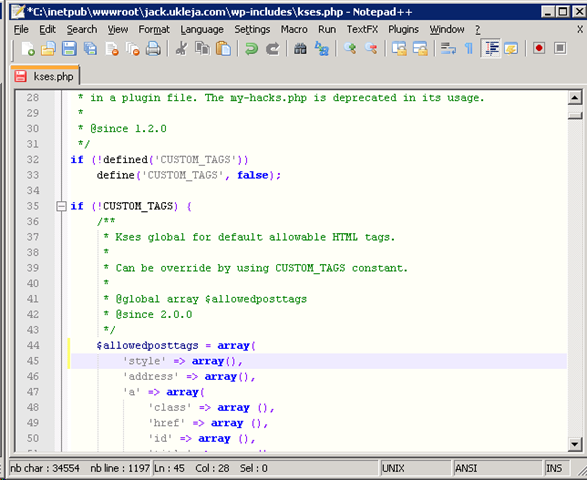
- Open the file in a text editor and locate the $allowedposttags variable
- Paste the following snippet of code:
'style' => array(),
- just after the line that says:
$allowedposttags = array(
Your code should now look like the image below:
That gets the backend of WordPress accepting the style tag. If you write a post now and post it using LiveWriter or the “HTML” editor in wp-admin it should get rendered out into your browser as desired.
The problem is, if you create or edit a post using the WYSIWIG “Visual” editor you will find that your style tag gets turned into a comment like so:

That’s because the client side JavaScript responsible for the WYSIWYG editor is stripping out the style tag and turning it into a comment. In the default WordPress install the WYSIWYG component is called TinyMCE. Here are the instructions for hacking (that’s the spirit of php isn’t it? ;-)) TinyMCE to allow the element tag:
- Open the wp-admin\includes\post.php file in a text editor
- Locate code where the $initArray variable is defined. Hint: it begins like this:
    // TinyMCE init settings
    $initArray = array (
- Now add the following line to the end of the array
'extended_valid_elements' => 'style
- Don’t forget to add a comma to the end of the preceding line! (in this example thats the one ending in “$plugins”)
If all goes to plan the lower half of the $initArray declaration should look like this:

After all that’s done don’t forget to force your browser to flush its cache i.e. by using Control + F5.
You should now be able to use the style element in your posts, allowing you to create inline CSS to your hearts content.
The same principle applies if you want to allow any other html tags in WordPress.